|
Tim and I happened to be in Murphy, North Carolina some time ago and stopped at this cute little barbecue place since it was lunchtime and we were ravenous. They had brisket mac & cheese tacos on the menu as one of their specials of the day. We thought that sounded intriguingly delicious so opted to give it a try.
So glad we did because that was the most delicious bite of the whole trip. 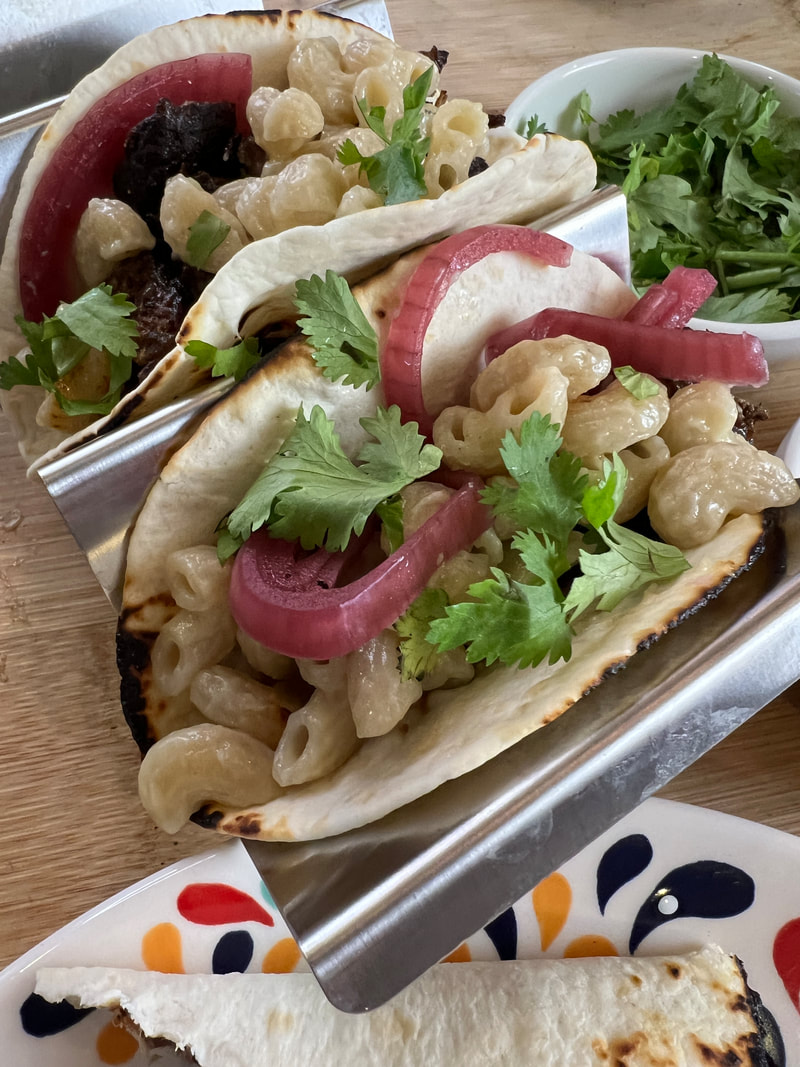
We were going to the same area again around my birthday so I thought we would stop off in Murphy to grab one of those delicious tacos for lunch and had planned the whole day around that.
Much to our dismay, the barbecue place was closed and we left deprived of our anticipated bite. Not to be deterred, I decided to come home and re-create that deliciousness in my own kitchen and I am quite happy with the result. 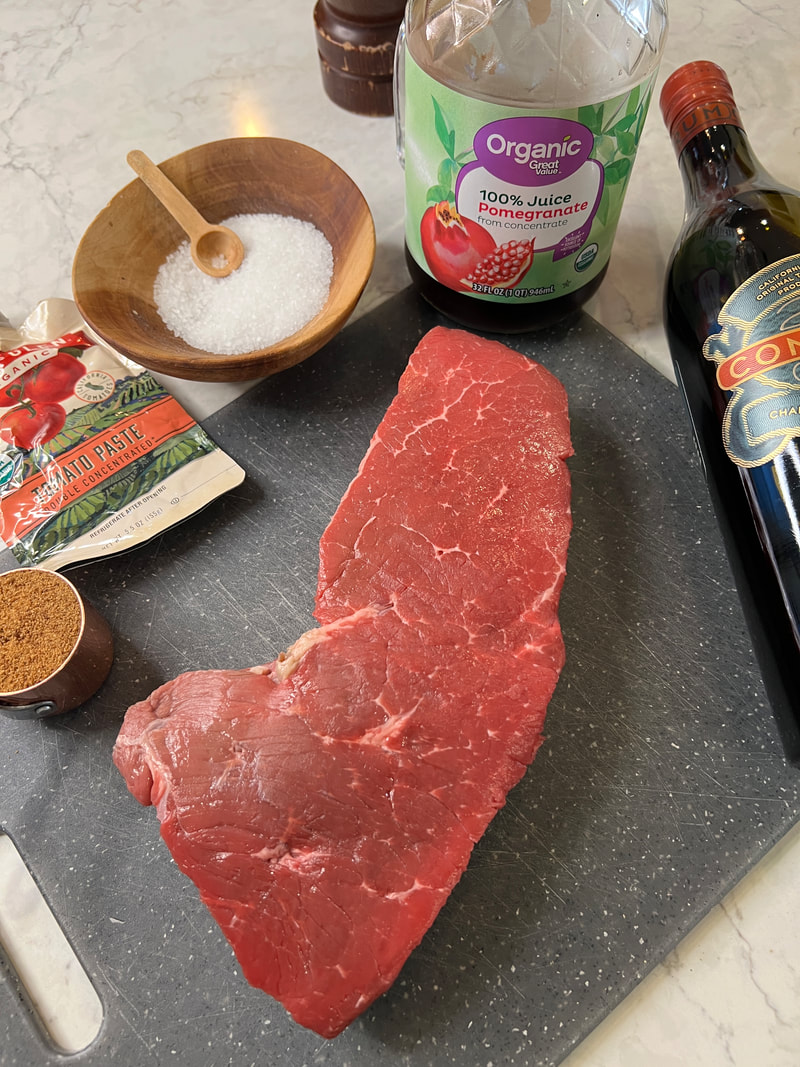
LONDON BROIL IS MY LESS EXPENSIVE STUNT DOUBLE FOR BRISKET
I went to 2 or 3 stores and could not locate a brisket anywhere, so I settled on a London broil which is a much cheaper cut of meat, and was so pleased at the outcome. A succulent end product for less money? Yes, please!
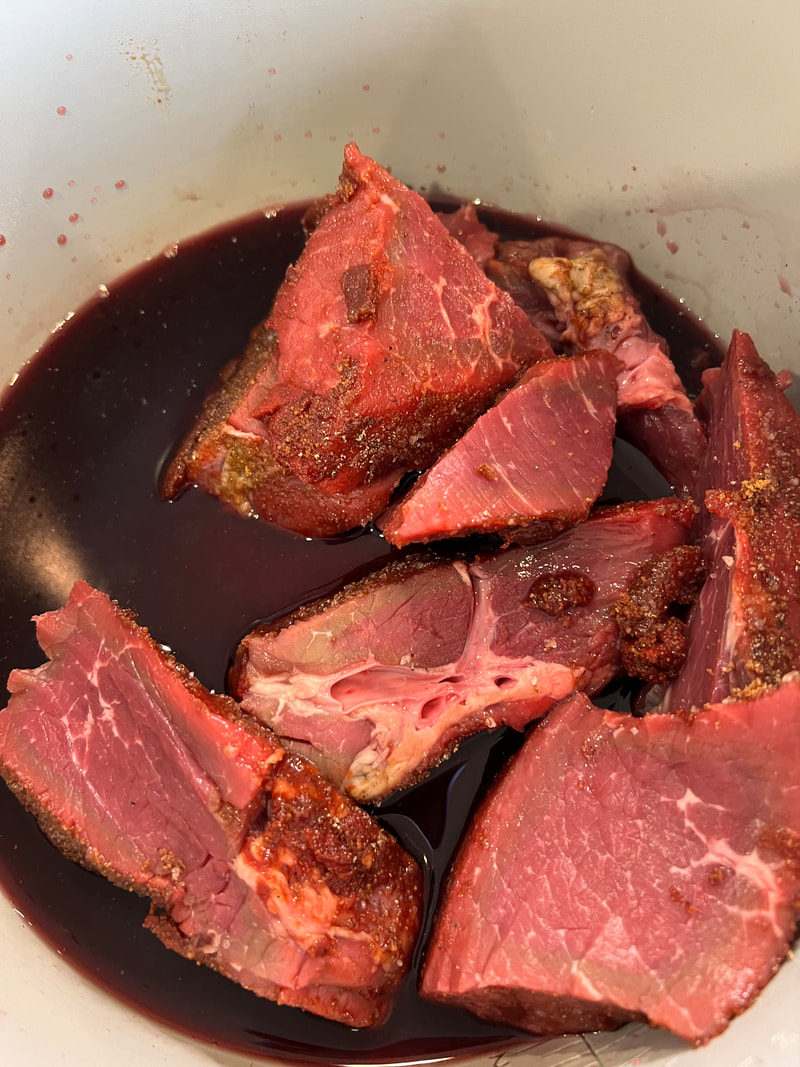
ALL TUCKED IN FOR A LITTLE PRESSURE COOKING
Pressure cooking the London broil in my Ninja Foodi for 30 minutes with a beautiful blend of pomegranate juice and red wine was exactly what was needed. The beef was tender and now just needed to replicate that smoky charred vibe that you get in a smoked brisket.
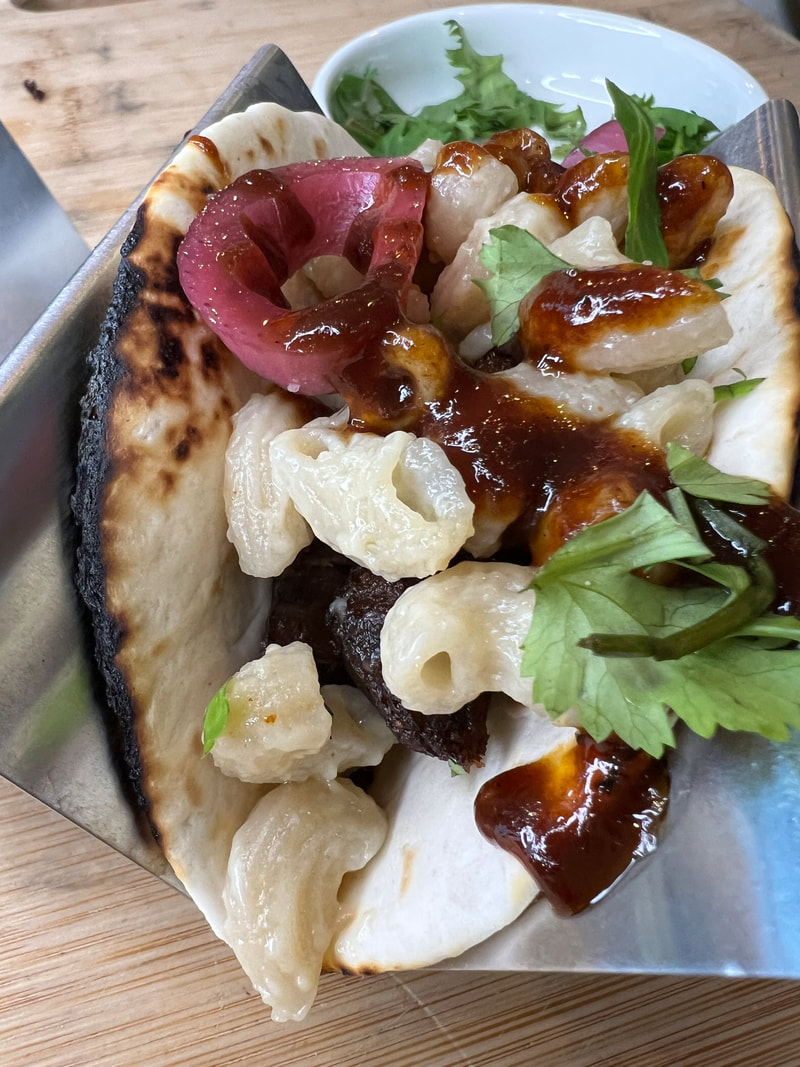
MY MOUTH IS WATERING JUST LOOKING AT THIS PIC
Smoked paprika to the rescue. I added the cooked beef to a skillet with some smoky paprika, Aleppo chili flakes which are also smoky as well as slightly spicy (not overwhelmingly so) and then finished it off with a bit of Worcestershire sauce. The result was fabulous.

To top it all off I reduced the pressure cooking liquid down to a thick, sticky sauce that is wonderfully delicious drizzled over the tacos.
Use your favorite mac & cheese. I had a gluten-free box mix that I was needing to use from the pantry so that mac & cheese was my selection for my tacos. To top it all off I reduced the pressure cooking liquid down to a thick, sticky sauce that is wonderfully delicious drizzled over the tacos. Use your favorite mac & cheese. I had a gluten-free box mix that I was needing to use from the pantry so that mac & cheese was my selection for my tacos. 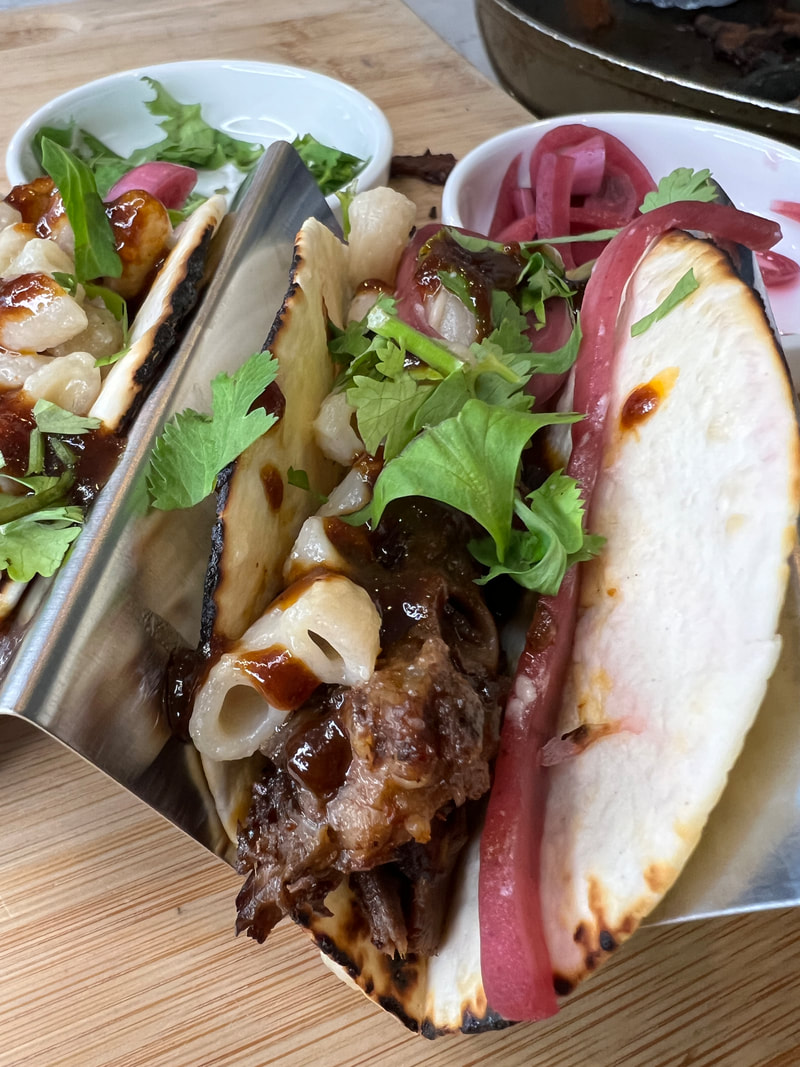
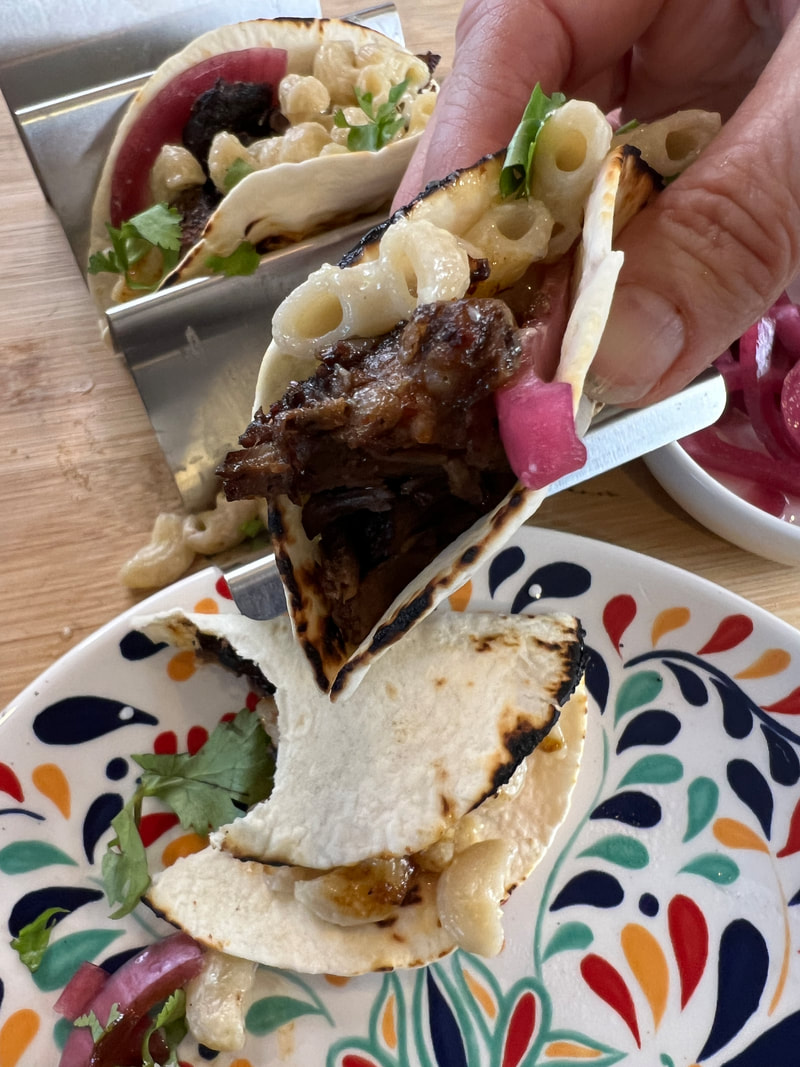
Being that the beef is so rich and the mac & cheese so, well, cheesy, I thought we needed a nice acidic hit for a balancing act, so I topped the whole thing with my pickled onions and a bit of verdant cilantro. Pure perfection!
I made this again for our Christmas Eve celebration and everyone was raving about them. It won't be long before they're on the menu again in the TaylorKitchen. 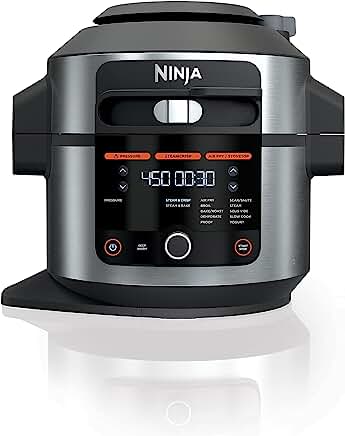
I literally use my Ninja Foodi on a weekly basis. It pressure cooks, sautes, air frys and so much more. I made short work of the beef with this appliance & couldn't sing its praises more. Check out out HERE or on my SHOP page.
"Brisket" Mac N' Cheese Tacos Serves 6 1 1/2 pound London broil (or brisket) 1/2 cup red wine 1/2 cup pomegranate juice 2 tablespoons tomato paste 1/4 cup coconut sugar 2 teaspoons salt 1 teaspoon pepper 1 teaspoon chili flake (I love Aleppo chili flake, which are slightly smoky) 1 teaspoon olive oil (optional if needed) 2 teaspoons Worcestershire sauce 1/2 teaspoon smoked paprika Prepared macaroni & cheese (boxed or homemade) To Serve: Tortillas (I like to use the small street taco sized) Prepared macaroni and cheese (use your favorite homemade or packaged) Pickled onions (see below ;-) Cilantro Combine red wine and pomegranate juice in the bowl of a pressure cooker or Ninja Foodi. (*See alternative below) Pat the beef very dry then rub with the tomato paste on both sides. Dust with coconut sugar, salt and pepper on both sides as well, then cut into large chunks. Place in the bowl of the pressure cooker and pressure cook for 30 minutes (that was how long it took on my Ninja Foodi. Other devices may take less or more time) Let slow release for 15 minutes then remove the beef from the liquid and transfer the liquid to a skillet. (At this point you can also refrigerate the beef and pull it out when you're ready to make the tacos) Add the pressure cooking liquid to a skillet and slowly simmer for 5 to 8 minutes until the liquid has reduce down to a thick sticky liquid. This will be perfect drizzled over your tacos. In a medium skillet over medium heat (I love to use an iron skillet for this) add the beef, working in batches if you need to. Sprinkle over the chili flake and smoked paprika mixing well as the beef starts to char. You can add a bit of olive oil here if needed. Add the Worcestershire sauce and mix until everything is heated through and the beef starts to caramelized. Assemble the tacos by loading each tortilla shell with some beef, topping with the warm macaroni and cheese and topping as you prefer with pickled onions and cilantro. * If you don't have a pressure cooker, you can prepare in a large Dutch oven or large pot in the oven at 3:50 for about 3 hours, or until the beef is very tender and you are able to shred it with a fork. My Pickled Onions 1 red onion 1 bottle rice vinegar - 1 large jar with tight fitting lid pinch sea salt Peel onion, cut in half, then cut into thin half moon strips. Pack into jar then cover with rice vinegar & add a pinch of salt. Cover and shake to "bruise" the onions. Let set for at least an hour before using. They'll keep in the fridge for weeks & we use them all the time!
0 Comments
Leave a Reply. |

Greetings!Mariann Taylor here of Taylor Kitchen. My husband and I created this site, Pinterest and Instagram accounts, and affiliated YouTube channel as an outlet for one of my passions....cooking. I love to cook and my husband, Tim, is a willing participant in my culinary escapades, as well as chief taste tester. We hope you'll join us, try some TaylorKitchen creations and like and subscribe to our YouTube channel. Categories
All
Archives
May 2024
|
 RSS Feed